Crispy Garlic Butter Chicken Thighs (Ready in 30 Minutes!)
Listen, I know what you're thinking — another chicken thigh recipe.
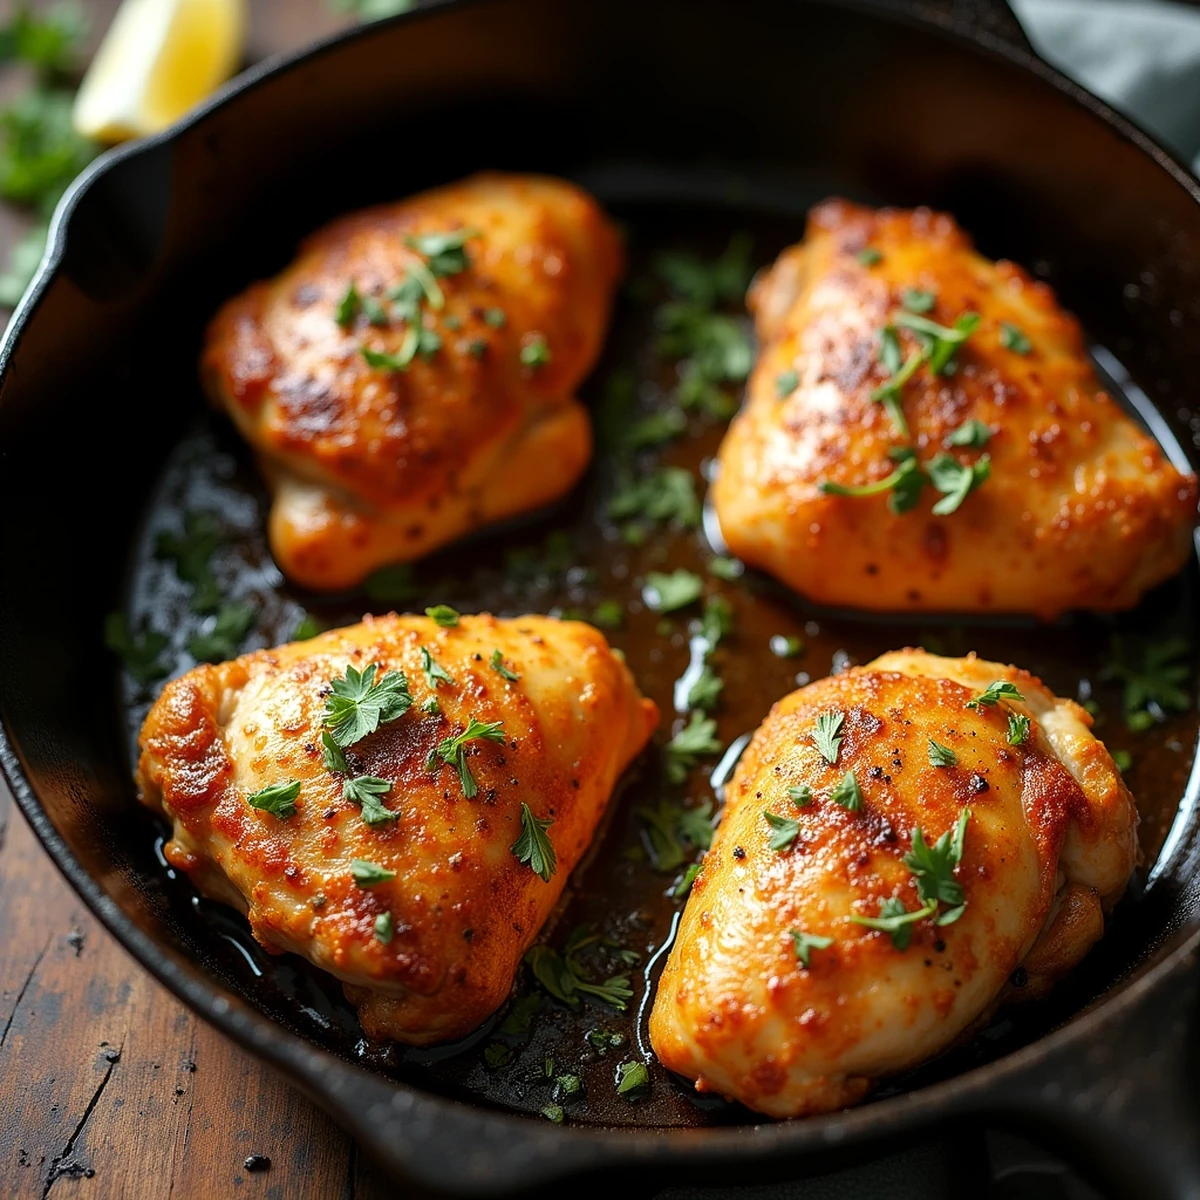
Listen, I know what you’re thinking — another chicken thigh recipe. But hear me out, because this one has been on our dinner table no fewer than three times in the last two weeks, and my seven-year-old has started requesting it by name. That is not something that happens in this house.
Here’s the thing about crispy garlic butter chicken thighs that nobody tells you: the secret isn’t some fancy technique or a special pan. It’s patience for about four minutes while the skin does its thing, and then the oven handles the rest. I discovered this method completely by accident on a Tuesday night when I was too tired to babysit a stovetop, and I have never looked back. The skin comes out genuinely shatteringly crispy — the kind that makes a sound when you bite into it — and the meat stays juicy because thighs are basically impossible to ruin.
The garlic butter situation here is the real magic. It’s five ingredients, it takes ninety seconds to make, and it goes on at the very end so it doesn’t burn and turn bitter. You get all that gorgeous garlicky richness without any of the sad, acrid smoke that happens when garlic hits a screaming hot pan too early. I’ve made this 47 times and I’m still refining the ratio, but this version? This is the one.
Make a double batch and serve it with rice, roasted veggies, or honestly just a big salad. Future you, standing in the kitchen at 5:45 PM wondering what’s for dinner, will absolutely thank you.
Ingredients
- 2 lbs bone-in, skin-on chicken thighs (about 4-5 thighs)
- 1 teaspoon kosher salt
- 1/2 teaspoon black pepper
- 1/2 teaspoon garlic powder
- 1/2 teaspoon smoked paprika
- 1 tablespoon olive oil
- 4 tablespoons unsalted butter
- 5 cloves garlic, minced
- 1 tablespoon fresh lemon juice
- 1 teaspoon fresh thyme leaves (or 1/2 teaspoon dried)
- 1 tablespoon fresh parsley, chopped (for garnish)
Instructions
-
- Preheat your oven to 425°F. Pat the chicken thighs completely dry with paper towels — and I mean really dry. This is the single most important step for crispy skin, so don’t rush it.
-
- In a small bowl, combine the salt, pepper, garlic powder, and smoked paprika. Season the chicken thighs generously on both sides with the spice mixture.
-
- Heat an oven-safe skillet (cast iron is ideal, but any heavy oven-safe pan works) over medium-high heat. Add the olive oil and let it get hot — about 1 minute.
-
- Place the chicken thighs skin-side DOWN in the skillet. Do not move them. Let them sear undisturbed for 4-5 minutes until the skin is deep golden brown and releases easily from the pan. This is where the crispy magic happens, so resist the urge to peek.
-
- Flip the chicken thighs so they are skin-side UP. Transfer the entire skillet to the preheated oven.
-
- Roast for 18-20 minutes, until the internal temperature reaches 165°F and the skin is deeply golden and crispy.
-
- While the chicken is in its last 5 minutes of cooking, make the garlic butter. In a small saucepan over medium-low heat, melt the butter. Add the minced garlic and cook for 1-2 minutes, stirring frequently, until fragrant and just barely golden. Remove from heat and stir in the lemon juice and thyme.
-
- Remove the chicken from the oven and immediately spoon the garlic butter over each thigh, letting it pool around the edges of the pan.
-
- Let the chicken rest for 5 minutes, then garnish with fresh parsley and serve straight from the skillet.
Nutrition
Tips
Listen, the dry chicken step is non-negotiable. I know it feels fussy, but moisture is the enemy of crispy skin — a quick 30-second pat-down with paper towels is the difference between crackling skin and something sad and rubbery. Don’t skip it.
And here’s where it gets good: if you have an extra five minutes, season the chicken and leave it uncovered in the fridge for up to 24 hours before cooking. The salt draws out more surface moisture and you get next-level crispiness. This is the game-changer move when I know company is coming.
No cast iron? No judgment — any oven-safe skillet works, or you can sear in a regular pan and transfer to a baking dish skin-side up for the oven portion. Just know the cast iron holds heat better and gives you a slightly more even sear.